Sunday, December 19, 2010

Art Glitter Tutorial Numero Two - Butterfly Using Fantasy Fiber

--------------------------------------------------------------------------------


Today, I'd like to introduce you to my second tutorial for December using http://www.artglitter.com/ products, namely Fantasy Fiber in Shimmering Pink to make the wings of a butterfly.  The previous tutorial featuring Fantasy Fiber is here

Equipment and Supply List

Iron
Sewing Machine
Scissors
Teflon coated paper or parchment paper
Fantasy Fiber - Color - Shimmering Pink
Embroidery floss and thread
Dresden (gold petite fleur-de-lis 1/8 inch trim)
5 velvet leaves (I had on hand thanks to Debby Harriettha....thank you Debby!)
Frozen Charlotte bisque doll head  or any other doll head (approx 1 inch in diameter)
Organza or other transluscent fabric as backing to Fantasy Fiber
Seed beads
Embroidery and beading needles
Cotton Ribbon
Sari silk fiber remnants
3 inch wide wired ribbon (for the top right and left wing parts)
Fabric Glue - optional
Embellishment for body of butterfly

1.  Follow these instructions (from Art Glitter.com)  to create a sheet from Fantasy Fiber:

"Set Teflon coated iron to medium or polyester setting. Place three to four layers of film or a small amount of fibers on parchment paper. Lay another piece of parchment or non-stick pressing cloth on top. Press with iron firmly for 3-10 seconds. Lift parchment to reveal a totally unique sheet of fabric! The more layers /fibers you melt together, the stronger the fabric sheet. You can die cut it, use a hand punch or scissors. Soon you will be able to predict the outcome of the bonding procedure, allowing you to create colors and textures you never dreamed of before. "

2.  Bottom wings - pin a piece of organza or other transluscent fabric to the sheet of fiber and free motion stitch around the piece create the bottom part of the left and right sides of the butterfly wings.  You could also trace or draw the wings on first.  I just did it 'free hand' as I sewed.

3.  Take a long piece of sari silk ribbon and twist it to create 'piping', affix it to the edges of the wings and machine stitch it onto all edges of the wings.

4  For the top part of the wings, I repeated Step 1 but this time attached a wired 3 inch ribbon to the wings...experimenting here as I went along.   Next time I will probably use the wired ribbon for all parts of the butterfly wings as the wire enabled the wings to be shaped further and adds a nice dimensionality to them.  I also like the transluscency of the fantasy fiber sheet as it allows for the 'swirls' of the ribbon below it to shine through.

5. For the body of the butterfly I machine stitched several times over another piece of fiber - just to create a base.

6. Sew the tops of the wings to the bottom of the wings.

7. Taking 3-4 inches of German Dresden border at a time, I adhered the border to the edges of the wings using a tiny bit of fabric glue to keep it in place. 

8. Once in place, I machine stitched over top of it.  This is a little 'tricky' because if you aren't careful the gold paint can seperate from the base of the Dresden.  If so, you can touch it up with a gold leaf pen. 

9.  Using a blanket embroidery stitch, I embroidered around all of the edges in gold.    I've also started to do some criss cross embroidery stitches in between the blanket stitches.   If you look closely, you can see this part of the butterfly is still a work in progress.

10. Attach the bisque head to the body - trial and error here.  because there were holes in the neck and top of the head of this doll head, I threaded a wired 1 inch wide ribbon through from top to bottom and then sewed it firmly to the back of the body.  I wanted to avoid using any glue wherever possible.  Experiment with your own creativity to determine the sturdiest way to do this. 

11.  Sew the five velvet leaves onto the body and wings.

12. Stitch beads onto the edges of the wings.

13. Add some seed beads to a ribbon by stitching them on and then wrap the neck with this ribbon for added stability.

14. Create a scarf or 'hat' with ribbon remnants wrapped around the bisque head and secure it with a few wraps of embroidery floss around the neck to hold it in place.

15.  Using whatever you have on hand for a body as an embellishment, attach it over the existing 'fiber' body - a great place to use your imagination. 

This butterfly still has a bit more beading to go and....who knows what else? 


Close up of details around the bisque head


This  photo illustrates the bottom part of the right and left wings with the organza underneath the Fantasy Fiber outlined  and attached by machine sewing them to a twisted piece of sari silk ribbon.    He ended up being a little 'pigeon-toed' but I am happy with his 'character'!


More snapshots of details

You can find beautiful examples of 'stamped' butterfly wings available at http://www.artglitter.com/   Thanks for reading and if you make a similar project, email me at twodressesstudio@shaw.ca - I'd love to see it!


Saturday, December 18, 2010

Sunday Postcard Art - S A N T A !!!

--------------------------------------------------------------------------------

Check out the other postcards this week here

Image Credits:  www.deviantscrap.com  - Finecrafted Studios - Santa and Holliewood Studios - for all other images - exception  - stamp from www

Thursday, December 16, 2010

The Butterfly Effect - Update #14 ONE HUNDRED - Part One of Two

--------------------------------------------------------------------------------
Last evening we were out for an annual Christmas dinner with friends when the subject came up about decorating our homes for Christmas. The wife of the couple we were with had asked if I had all of my 'decorations' up. She is a wonderful enthusiastic woman and would give Martha Stewart a run for her money any day. I felt a wave of 'shame' well up inside of me as, apart from our tree sitting in the corner of the living room with lights already strung, I haven't done any decorating this season. Without family close by, and celebrating Christmas away from home again, it hasn't been a priority. Nevertheless, I must confess I did feel odd about it. But only for a brief moment. In my mind's eye, instead, I thought about what WAS in our dining room. A table over-flowing with butterflies.   While I was taking photographs of the newly arrived butterflies yesterday to prepare an update for today , the "spirit" arose to take all of them out from their envelopes and protective packages and spread them on the dining room table. As I recalled the table bursting with Love and Kindness, and Hope for the end of hatred and for the promotion of Peace, I realized how much Spirit filled our home, thanks to all of You. The Warmth and  Loving Energy  of the butterflies is overwhelming.  It is palpable.   I can't think of a more poignant and heartfelt  way to express the spirit of this season than to celebrate the kindness and thoughtfulness that exists in each and every one of these jewels.

The first 100 - more 'group' photos to follow in Part Two


YES! We reached the ONE HUNDRED mark yesterday, with the most recent arrivals.  A huge thank you to

Laura Hegfield and her daughters
Belin Hegfield
Rosewillow Hegfield (age 13)
Emily Miller
Marilyn Ritzau who is busily making more butterflies
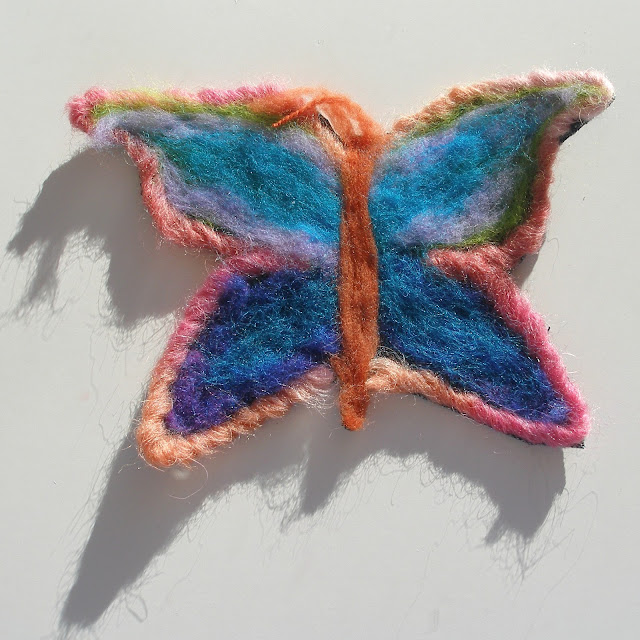
Lyn Griffiths who put her felting expertise into play
Vicki Holdwick who together with her granddaughter
Payton Brooks (age 7) honored the Holocaust children one afternoon

Emily Miller
Cottonwood, Arizona, USA


Belin Hegfield
Amherst, New Hampshire, USA


Rosewillow Hegfield (age 13)
Amherst, New Hampshire, USA


Laura Hegfield
Amherst, New Hampshire, USA


Marilyn Ritzau
Bethesda, Maryland,  USA


Payton Brooks (age 7)
Pleasant Lake, Michigan, USA

Vicki Holdwick (Payton's Grandmother)
Pleasant Lake, Michigan, USA


Lyn Griffiths
Bourton-on-the-Water, Cheltenham UK
http://colourstudio-fiberfanatic.blogspot.com/


I wanted to share these precious butterflies before another day went by and will be posting again before Monday to tell you about our next draw as well as some exciting news about our project I've been waiting to share for a few months. 


Wednesday, December 15, 2010

Who do I belong to?

--------------------------------------------------------------------------------

In my absent-minded right brained mode, I failed to retain the image credits for this wonderful figure above.  If you recognize her, would you be so kind as to leave a comment?  Thanks so much!

Tuesday, December 14, 2010

Snap Happy

--------------------------------------------------------------------------------
Below, photographs of a 4 x 8 inch skinny page for this months' Oh My Gothic project - this one is going to Linda K. in Pennsylvania.   These are digital illustrations I created initially as 5 x 7 inch limited edition prints (seen on the right hand side in the Etsy listings)  that I modified and reconfigured into the 4 x 8 inch size, transferred onto cloth and finished.


Front and Back


Image Credits here

Friday, December 10, 2010

Incoming!

--------------------------------------------------------------------------------
Friday, December 10th, 2010

Anytime I receive mail from my artist friends, I always intend to blog about what I've received.  So today, I will begin by THANKING all of my wonderfully talented art blog and trading partners around the world for how much joy you give me - almost weekly!

What I decided to do today  was create this post and add  a hot link on my side bar to it.  That way, I can review it myself and also share the wonderful artwork  I receive in the mail all in one destination!

Yesterday's mail was sent by Cat Dodt-Ellis (CatWorx), one of several art friends I've come to know primarily thanks to Debby Harriettha's (The Gathering Nest)  on-going projects.  For almost a year now, there has been 17 artists involved in a skinny book project through her group - Oh My Gothic! 

Cat has been a Zettiology fan for years and so it's no surprise, she has mastered this 'genre' beautifully.  I have taken 3 snapshots of her skinny - hoping I could visually convey the amount of work that went into this page.  Each one of the circles is handcut and adhered.  The macro gives you a better idea as the full photos don't show the amount of detail.

Thanks so much Cat!


Above collaged 4 x 8 inch art  pages by Cat Dodt-Ellis (see above for link to her blog)

Ham It Up! - Sunday Postcard Art and Uncle Herbert

--------------------------------------------------------------------------------
"Ham It Up" - Xmas Card

Image Credits -
Freubel - some pigs
Tangie Baxter - one pig
Most other images - Holliewood Studios - http://www.deviantscrap.com/ - Christmas Morning...recolored


"My Great Uncle Herb"

Image Credits -
Holliewood Studios - Little Prince and Love and War
Clementine Design - money bag
figure  - my great  uncle!


Sunday Postcard Art - "Robins"

Play along here

Image Credits:
Figure and bird - Sherrie JD
Bird house and cabin - Holliewood Studios - Christmas Morning

Wednesday, December 08, 2010

Experimenting with Art Glitter Fantasy Film - Tutorial: Mixed Media ATC

--------------------------------------------------------------------------------
At the beginning of the month I began a 3 month commitment to work with several products from Art Glitter (click for direct link to their website and store or here  at http://www.artglitter.com/ )  From my experiments, I'll be sharing a total of six projects during this time period. 

 I came across this company while brainstorming ideas for a butterfly for the Holocaust Museum Houston project.   And since they were looking for guest designers, and I liked the idea of opalescent semi-transluscent  butterfly wings - the decision was easy!

 For the past few weeks I have been watching videos on-line and experimenting with Art Glitter's fantasy film as well as their fantasy fiber and glitter.  Today I finished the front of a second fabric, mixed media ATC utilizing Fantasy Film.

My two previous posts this week feature 3 digital ATC's I created using images from Tumble Fish Studio. 


Today I focused on the one image I hadn't worked with and discovered  two 'new' techniques while experimenting.   


Materials and Supplies:

Digital ATC transferred onto
Inkjet Fabric Sheet
Art Glitter Fantasy Film "Krista's Eyes"
Threads
Sari Ribbon
Pan Pastels
Lace
Computer and Printer
Sewing Machine
Scissors
Iron

Instructions:

  1. Print digital ATC onto fabric.
  2. Iron a fusible fiber onto the fabric ATC
  3. Begin machine stitching with different colored threads
  4. Using  pieces of Art Glitter Fantasy Film - "Krista's Eyes" already heat set (instructions for this are available here)  position it over the fabric and machine stitch around it. 
  5. Trim edges of the fantasy film  outside of the stitching. 

 ***Think of the fantasy film application the same way you would any type of transluscent material like tuile or organza. 
   
     6.    Edge  stitching with sari ribbons, other hand-dyed fibers, laces.

     7.   Although I was happy with the results of the fantasy film applications, I wasn't pleased with the white edges of the pellon  around the ATC that remained.  To 'cover' up this white and to also add some complementary colors to the ATC, I applied pan pastels with an applicator and rubbed the pastel around the parameter of the ATC as well as adding some variation in the red lace.  I am thrilled with the brilliance of the pan pastel colors and ease of application onto fabric.  Expect to see more experimenting with this new found application!

Here are a variety of photographs.  Because the Fantasy Film is opalescent, it catches the light for a wonderful multi-colored reflection.  This can be tricky to photograph.  Below you'll see photographs taken under two lighting conditions - a warm yellow incandescent lighting and natural filtered sunlight. 


Fantasy Film, Pan Pastels, Sari Ribbon and in the background is the fabric I plan
to finish the back of the ATC with.


The fantasy fiber is on the left vertical edge, the bottom right corner and in a circle bottom left.   Above and below best illustrate the variation of the red lace after applying the pan pastels as well as the red border that was white prior to the application of the pastels.


The following  two photographs illustrate the difference in lighting (these are taken with incandescent yellow lighting above - quite a significant difference in hues compared to the ones above taken in natural filtered sunlight.


Thanks for reading and stay tuned for more experiments!

Image Credits here

Tuesday, December 07, 2010

Mini Tutorial - Artist Trading Card Fabric Christmas Tree Decorations

--------------------------------------------------------------------------------
Front

Back

Artist Trading Card Christmas Tree Decorations

These are fun and relatively easy to make.

1.  Print digital ATC's onto inkjet fabric.
2.  Ironed the fabric onto Wonder Under
3.  Background and edge outline stitched with  red, teal and metalic gold threads using a sewing machine.
4.  Add  antique lace,  tuile, gold fiber.
5.  Heat emboss a bit of gold on the edges,
6.  Punch a hole and add a grommet.
7.  Thread a sari ribbon remnant through the grommet.
  
Time spent -  Digitally creating the cards took approximately 3 hours, the rest - 2 hours.

It's a Tumble Fishy Season

--------------------------------------------------------------------------------
 Artist Trading Cards
- using images from a variety of Tumble Fish Studio collage sheets  available  here  plus far right figure from Paper Whimsy

Saturday, December 04, 2010

The Butterfly Effect - Update #13 including Announcement of Winner

--------------------------------------------------------------------------------

I would like to begin this weeks update sharing first some information I gathered this week.

On Wednesday afternoon, I received an extraordinarily heartfelt butterfly along with a note from Joyce Van Der Lely from Christchurch, New Zealand. In it she spoke of her personal experiences growing up in Holland so close to the Holocaust and described later her visit  she made to Yad Vashem located in Jerusalem, Israel.  A description of this museum from the website -

"As the Jewish people’s living memorial to the Holocaust, Yad Vashem safeguards the memory of the past and imparts its meaning for future generations. Established in 1953, as the world center for documentation, research, education and commemoration of the Holocaust, Yad Vashem is today a dynamic and vital place of intergenerational and international encounter. "

Joyce's  note lead me to explore this museum on -linewhere I found this short video featuring the art of Holocaust survivors, spanning 60 years.  I hope you find it as compelling and emotionally powerful as I have. Thank you Joyce.


This week, 13 butterflies arrived, each one bringing its  own unique blend of creativity and compassion. The artists who contributed and who I wish to again thank are -

 Kathleen Legg
 Lynne Hunter-Johnson
Joyce Van Der Lely
Gail Whitter
 Faye Hoover
 Margaret Beck
 Betsy Harding

From rose petals, to graphite drawings, zen tangles, mixed media fibers, sewing,  encaustics and hand dyed natural papers, please take a moment to visit the individual blogs listed below.


 Joyce Van Der Lely
Christchurch, New Zealand


KATHLEEN LEGG
Lethbridge, Alberta, Canada


LYNNE HUNTER-JOHNSON
Lethbridge, Alberta, Canada


GAIL WHITTER
Trail, British Columbia, Canada


MARGARET BECK
Waterford, New York, USA


FAYE HOOVER
Virginia, USA


BETSY HARDING
Lehigh Valley, Pennsylvania, USA


On to the draw - As many of you know, the Holocaust Museum Houston based its exhibit on the book I Never Saw Another Butterfly.  I ordered two copies of this book soon after I began our project here, one to read, and one to give away to one of the participants.  I asked my friend Linda to choose a number between 1 and 89 yesterday and used this number (43) to choose the winner of the book.


Sharne Gregory's butterfly was Number 43. 
 I will be mailing out the book early next week Sharne. Here is her winning butterfly -


Sharne Gregory
Essex, England, UK


Please stay tuned for next weeks announcement of a new draw plus other exciting news!  And there is still over a year to participate!  For more information on how to participate,  please click on the Butterfly Effect tab above.