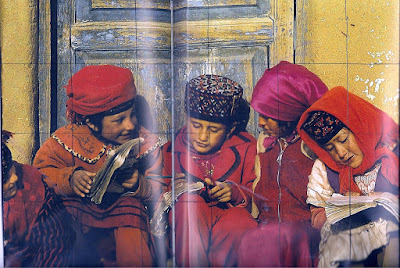
 Directly above is the National Geographic photograph, although this is about 5/7th's of the image I am working with. The entire image is 15" long and wouldn't all fit on my scanner.
Originally I had envisioned it as a long and narrow structure and relatively large - 20x40 inches. However, they didn't have a canvas in that size so instead I chose one that was 20 x 30 inches and cropped the original to fit these proportions.
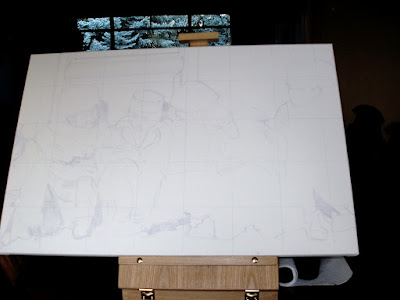
 Below, is a photo of the beginning of my drawing. I've divided the canvas and the drawing into a grid to assist me in ensuring the drawing is proportionate. Which brings me to my second tip - use a watercolor pencil to draw your image onto the canvas. If you need to erase at any point, you simply wet a paint brush and brush over the line to be erased and then wipe any excess water with a towel. It will erase completely. I used a Derwent watercolor pencil but any brand or color works. This prevents the ugly graphite smudges that result from using a regular HB pencil.
Drawing the Image on the Canvas with Watercolor Pencil
I began to draw the image from the left hand side, but occasionally skipped over to another part of the drawing. Jill corrected this. Why? In order to ensure the drawing remains accurate, she recommended to work across the canvas, systematically. This way you will ensure that each portion of the image is in correction scale to the others.
Finally, a tip for left-handedness. Begin drawing the image from the right hand side! This way your hand doesn't cover up what you are drawing as you work horizontally. It also makes it easier to 'see' things in their proper relationship with each other and flows more naturally. So, for my fellow LEFTIES out here in blog land - don't read the drawing like you would a book. Another benefit is if your hand is moist and resting on the canvas, it won't smudge what you've already put down.
I am hoping to have the drawing complete by next Thursday so I can start to learn her valuable lessons on blocking in the paint.


3 comments:
Wow, this is great, thank you so much for sharing this. There may be classes like this around me but I haven't found them and this is something I am sooooooooooo interested in learning. :)Bea
//dog-in-the-hole-studio.blogspot.com//
Oh, and I forgot to tell you that I love that picture of the children.
:)Bea
Yes, thanks for sharing that tip I have that very same easel!
Michele
Post a Comment