Sunday, February 23, 2014

Recycled "Renaissance" Ballet Flats !

--------------------------------------------------------------------------------
I am back in record time, to share my latest "Shoe Makeover"!  Needless to say, I am finding great satisfaction in saving my old favorite shoes that have outlived their 'best by date' and then some.  

I am a very basic dresser.  I wear the same earrings week after week, buy plain white Tshirts in bulk at Costco for $8.99 each and either blue jeans or black leggings.  

But, I do love me some variety in shoes.   Not too blingy and heels are a thing I have left far behind in the past (except for 3-4 days per year).  I am a comfort dresser and happy to be rid of caring about style. Warmth, practicality, natural fabrics and C-O-M-F-O-R-T. 

As you can see, in the 'before' photo below, these shoes had seen much better days!  I am sure I wore them everyday one summer, a couple of years ago - in fact, "plain old gnarly" seems to be the best way to describe them.

To see how easy it is to recycle your own favorite shoes - I posted a tutorial here.

All you need is two sheets of Craft Attitude - available here a glue stick (I use UHU brand) a pair of scissors and an x-acto knife. That's it.    Total makeover cost $5.00 (not including the new inner soles or original cost of the shoes) 

I did break down and purchase new inner soles but I can swap out easily as I build my new collection of recycled ONE OF A KIND - altered art shoes!    

Grubby Before Shot 


Getting Bent BACK into shape!


Five Dollars!!


I used images from  an Itkupilli Imaginarium kit  available here

Saturday, February 22, 2014

How to Make a "Better-than-New" Pair of Recycled Flats

--------------------------------------------------------------------------------
If you had a chance to read my last blog post,  I mentioned  I was just getting warmed up.  After experiencing how easy I altered the handbag, I immediately started looking for other items on hand I could transform!  Shoes was the next logical experiment and, I happen to have a "small" collection to choose from. 

This pair have seen better days (ya think?)   Since they were one step short of the trash bin, I thought there was nothing to lose.


Before (pretty ratty heh?)

This is a beginner project and requires very little time, talent or supplies.  

Here's all you need (minus the brayer):


1.  I covered the shoes with one coat of Golden liquid acrylic paint (titanium white) - you could also use a Folk Art paint (often available at the dollar store for a buck or two)


2.  You will need two sheets of Craft Attitude (available on-line at www.Amazon.com)

3.  Print your pattern using an inkjet printer on to the Craft Attitude sheets and remove the backing.

4.  Liberally apply glue to the shoe - and I mean liberally.  Don't scrimp on the glue people!


5.  Place the translucent film over the shoe, lining it up to make sure it cover as much as the shoe as possible.


6.  Using your fingers smooth out the Craft Attitude beginnning at the toe and working around to the sides.  If you misalign it, you can lift it up again and reapply.  It isn't that stressful!  You have plenty of working time.  The glue doesn't dry quickly and the film is sturdy and it is also a little stretchy and will 'move' 2-3 mm if you are out by a smidge.

7.  Take your scissors and roughly cut out the area that is surplus that is laying over the opening in the shoe.  (You will need this to finish the back of the shoe.)   Cut out around the sole of the shoe in a similar fashion.   

8.  Using an x-acto knife, make your fine cuts to finish off the edges using the lines of the shoe and sole as your guide.  With a sharp blade, a ten year old can manage this easily.

That's it!  If you are doing this for the very first time, it may take up to an hour to finish both shoes.  I have a bit of experience so I completed the project in under 30 minutes.  Yes. Half an hour. 

After shots: 


How easy was that?  

It took me much longer to complete this blog post than it did to transform these beat up shoes into a better than new pair of shoes!  And, even though I am not a 'matchy-matchy' person, I just may throw on a white shirt, a pair of jeans and break into a new 'coordinated' look!   

Thanks for reading!  I am half way through my next pair of recycled shoes and will be back to share my musings early next week!  

Wednesday, February 19, 2014

Craft Attitude Makeover Part One - Boho Handbag

--------------------------------------------------------------------------------
I decided even though winter will still be on my doorstep for another two months at least, there wasn't any reason why I couldn't at least start thinking about spring!  And spring to me means a couple of things - warmer days, and the rebirth of COLOR in nature.  

I've seen lots of cool examples over at the Craft Attitude Facebook Page on how to personalize your iPhone, but I rarely use mine unless I am travelling.  So instead, I thought - why not try my hand at repurposing a rather lack-lustre handbag.  

I found this one at Winner's with a substantial discount and it was a light color.  Since I was introduced to Craft Attitude about two years ago, I always have my eye open for light colored and inexpensive 'objects' to add some "Attitude" to! 

Plain Old Inexpensive Handbag


This month I seem to be drawn to a color pallette that is half  Bolliewoodish and have Bohemian  and so once I`d layered a suitable number of images (courtesy of Iktupilli and Tumble Fish Studio) I adjusted the color pallettes to suit a brightly colored motif: 

Back of Bag  - digital collage

Front of Bag - digital collage


I used 3 sheets of Craft Attitude (you can use any type of Attitude product) - they are all the same just different packaging.....trust me on that!
And above is a photograph of the ALL of the supplies you need to make your handbag (gluestick,
scissors, x-acto knife, brayer....easy-peasy.


I really did not expect it to be this easy.  The fabric of the handbag (100% polyester) seemed to be  the perfect match for the Craft Attitude.  I am NOT shy with the glue stick, - just sayin....please do not try to skimp on the glue or you may end up with bubbles underneath.  Not pretty.  I NEVER have any bubbles.  I sometimes have globs of glue on my hands at the end of it all, but NO Bubbles EVER.


Above are photos of the front and back.  The purse was not the same size as the Craft Attitude (8.5 x 11 inches) so I did have to add extra little strips to each side so that it it was fully covered.  The pattern was very conducive to being able to do this successfully.  

Here are a few snap shots I took randomly in an effort to capture how beautifully the Craft Attitude molded to the fabric of the bag - I will be looking for more of this material!! 


I remain impressed at how the film becomes part of the texture...if you look closely you can see slightly raised dots on the surface of the purse.


Craft Attitude Boho Handbag - Spring 2014 coming soon!


PS - I could not stop at just the bag.....I will be back in a few days with photos of.....I bet you can you guess what I made next?   Stay tuned.

Thanks for the visit - and as always,  your comments are always appreciated...more than you know!

Friday, February 14, 2014

Walk In the Snow - Linda Tanaka

--------------------------------------------------------------------------------


 Below is the process Linda Tanaka undertook to create her work titled  "Walk In the Snow" for the Open Studio Project with Craft Attitude.  To read more about Linda and her statement on this piece please follow this link. 

Materials:

Canvas
Acrylic ink
Golden open acrylics
Golden soft gel
Liquitex Opaque Flakes
Craft Attitude Transportable Inkjet Film


1.  Preparing the canvas with Golden Irridescent Pearl and Liquitex White Opaque Flakes -


2.  Creating the calligraphic lettering to be transferred on to the Craft Attitude Transportable Inkjet Film -


 3.  Using a light table Linda made a sandwich of the paper turned upside down and a layer of Craft Attitude taped on top, shiny side up. A  traceable pattern  allowed her to hand letter on the shiny side of the Craft Attitude that could then be applied to the canvas.

Note:  An alternative to the method Linda used above,  you could also take a photo of your original calligraphic lettering, and then with an inkjet printer, print the lettering directly onto a sheet of Craft Attitude.  Don't forget to choose " mirror image " in your printer setting options before printing it out. 


3.  Linda used a Nikko G flexible nib dip pen to letter on the shiny side. The pen glides easily but does not allow for as much pressure and lift as a calligrapher would want to use. The material is a bit “stretchy”; that attribute is what allows Craft Attitude to be applied so successfully to a textured surface. The calligrapher has to be careful not to distort the material with too much downward pressure when making the stroke.

4.  Cutting the Craft Attitude out - 


5.  She then adhered the art film onto her canvas substrate using Golden soft gel medium and completed her lovely  textural piece.


"Walk In The Snow"
Mixed Media on Canvas - 7" x 9" inches
Linda Tanaka


Sunday, February 09, 2014

Enter to Win A Free Copy of - Incite: Dreams Realized - Hardcover Book

--------------------------------------------------------------------------------
Today, I spent some time reflecting on how blessed I am for a list of reasons far too lengthy to begin to list here.   I also began to make my "to do" list of  what I hope to accomplish this week, adding in what plans were already booked.  

Noticing Friday was Valentine's Day, I found myself thinking back to the times I spent as a divorced woman, raising two children .  I can recall a few years when Valentine's Day was not about celebrating with someone I loved, but more about surviving another year of being rather frazzled and lonely.  On more than one  occasion I confess at some level I  did partake in my  own little pity party about how being a single woman in her 40's wasn't the life I had planned.  

So now, when Valentine's Day approaches every year, even though I eventually did find the love of my life,  I continue to  count my blessings  along with feeling a deep sense of compassion for the many single Moms out there who find themselves alone on a day designed for couples, but who probably deserve ( more than many others with husbands, boyfriends, or partners)  a dinner out, a glass of champagne and a surprise bouquet of flowers to arrive at work.  

Although I am not able to effect the lives of every single mother with children alone on Valentines Day, I can perhaps offer a small gift that may bring a smile to one woman's face on February 14th, 2014.   It was a 'dream come true' for me to be published in this lovely book, and an honor for me to pay it forward!!! -

Here's how to enter:    

If you are a single woman, raising children, or you  know someone who is, OR, you can think of a  good reason why you would be deserving, please  leave a comment stating your reason below and this Friday I will select a winner who will  receive  a free copy of this beautiful hardcovered book -  Incite:  Dreams Realized - The Best of Mixed Media.   


And, along with a stunning selection of artwork from 93 different artists, my artwork is featured on Page Five - 

Night Sky – 6” x 6”x1.5” inches
  mixed media on rice paper, made with a  Craft Attitude film overlay, watercolour, vintage ephemera (cigar labelling),  skeleton leaves on cradled wood panel

Below - 3 different views - 


 Good Luck - and....Whatever your dreams may be this Valentine's Day - may they all come true!

Friday, February 07, 2014

Step by Step Tutorial: Craft Attitude: Heart Shaped Lavender Potpourri with Free Images for Download

--------------------------------------------------------------------------------
The folks at Craft Attitude were kind enough to invite me back to create a fun little Valentine's Day project with, you guessed it... Craft Attitude! 

After pouring over dozens of Pinterest photos, tossing around a few ideas, I decided - Who says hearts have to be red?

I am declaring Valentines Day 2014 the year of the Green Heart! 


So, here's my little idea  along with a suggestion I hope you'll be open to???    Instead of surfing the web right now, why not spend an evening creating a few fragrant lavender filled potpourri's?   The internet will wait.  And start to finish  all you will  need is 3 hours....  and no experience  is necessary!

All you have to do is find a nice cozy chair, print out one or more  little heart shaped graphic (see below for link to FREE graphic),  grab a needle and thread, maybe a glass of wine or  a nice fragrant tea and by the end of the evening, you'll have a lovely little heart shaped potpourri.  

You can use an old pillow case or some such, nothing fancy.  After all, isn't a gift that speaks of  time dedicated and thoughtfulness felt   worth more than a box of chocolates?  (well, just, maybe?)

Wrap one up for your BFF this Valentines Day...what girlfriend wouldn't appreciate this?   Or maybe you need to just give yourself a well-deserved treat and tuck it  inside your own lingerie (aka PJ's :0) )  drawer.

Here's what you need:
  • Heart images from Hidden Vintage Studios at Deviant Scrap . BLESS her soul, Tracey Parker, the Designer at Hidden Vintage generously offered to provide the heart graphics she created FREE OF CHARGE for you - you can download them here or here, or here.  Thank you Tracey!!!  If you want to send a thank you in the comment section beow,  I'll be sure to forward them off to her!  She's a true sweetheart.  Thanks Tracey!
  • One sheet of Craft Attitude  ( one sheet will be enough for 4 4x4 inch hearts)
  • Printer
  • Scissors
  • 10x10 inch piece of repurposed fabric
  • Scissors
  • Thread
  • Needle
  • Embroidery thread
  • UHU Glue stick
  • seed beads
  • lavender and/ or polyester stuffing/fragrant loose tea, (or a drycleaning bag cut and squished up if push comes to shove!)
  • Ribbon, scraps of tatting, ephemera bits.

Steps:

1.  Print the  heart  pattern out on to Craft Attitude Transportable Inkjet Film. 
2.  Glue shiny side  and place over recycled cotton fabric.
3.  Remove  the  backing attached to the art film  and smooth the two combined layers  out with your fingers, or iron it flat.
4.  Now, cut the heart out, and leave about a quarter inch salvage.
5.  Embroider, stitch, and embellish the heart  complimenting the colors  already in the collage to your heart's content.  It's lovely just as is too if you are pressed for time!
6. Cut out the piece of fabric for the back side of heart, leaving a 1/4 inch salvage.
7. Placing right sides together, stitch around the heart, leaving a small opening to fill the heart with stuffing/lavender or???? Here's a thought -  if you don't have lavender - check out your herbal/spiced tea bags...so many teas these days are so fragrant. 
8.  Stuff the  heart and then stitch the heart closed.
9.  Make a bow from ribbon and stitch to top of heart.  Adourn it with any other found objects you have waiting for this exact moment!


Here's what the Craft Attitude Inkjet Film looks like as it is being removed from its backing.  Tip:  Be earth friendly and keep the backing for later use!  I make greeting cards with it.


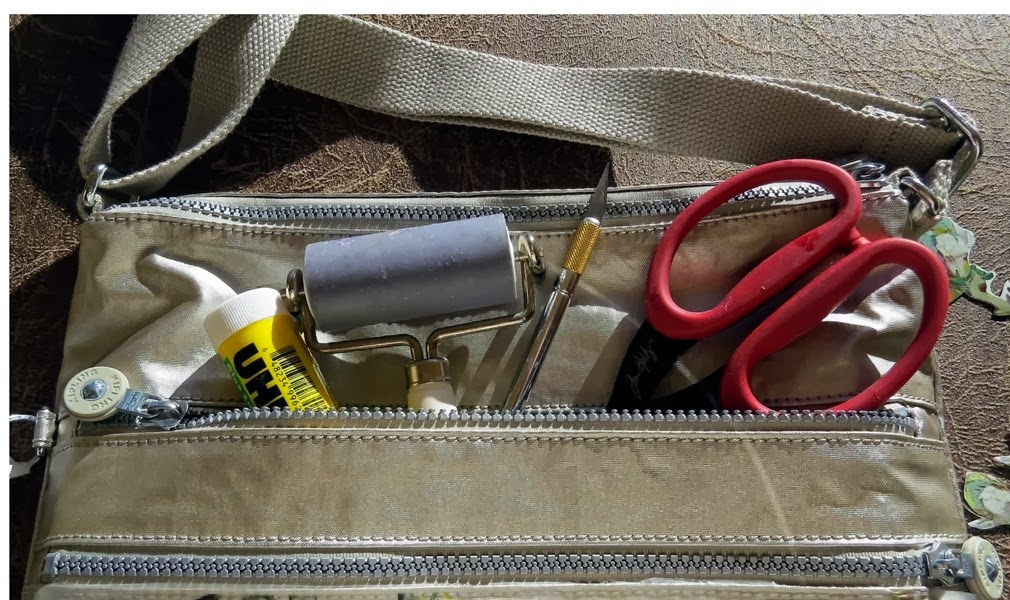
Gather your supplies (I always use a box to make clean up breeze.)
With everything  ready to go, next - boil the water, or pop the cork.  Time to relax.


Stitch around various areas and add beads here and there.  I came across  an old piece of vintage tatting (the little cream colored round bits)  and decided to sewed it on too.  Depending on how much spare time you have, you can add more beading or stitching. Anything goes!

Most of all I hope you have a Happy Valentine's Day (in any color you choose!) and thanks for stopping by!